How to Integrate the Paymento Crypto Payment API: A Complete Developer Guide
Integrating a crypto payment API is simpler than most developers expect, especially compared to card payment APIs with their tokenization layers, PCI compliance overhead, and multi-step verification flows.
The Paymento API follows a clean five-step model: create a payment request, redirect the customer to the payment gateway, receive a callback, verify the payment, and fulfill the order. No blockchain node required. No custody of keys. Funds go directly to the merchant’s wallet.
This guide walks through every step with real request and response examples, covers the full order status machine, explains HMAC signature verification, and flags the edge cases that trip up most first-time integrations.
Two Ways to Integrate: Choose Your Path
Before writing any code, it’s worth knowing you have two distinct integration paths with Paymento.
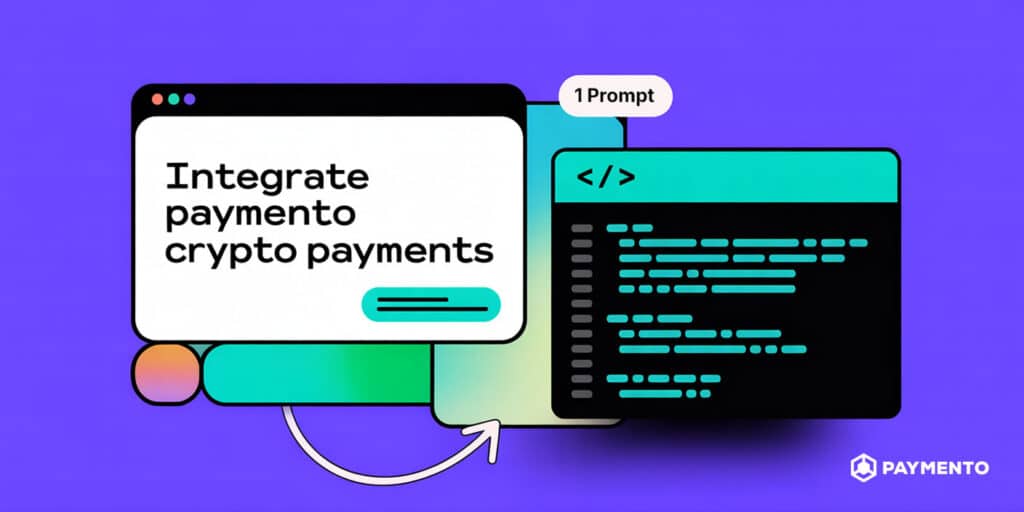
Path 1: Vibe Code It in One Prompt
Paymento publishes a complete integration document on GitHub including the full API guide and a Swagger spec, specifically designed for AI-assisted development. If you work with Cursor, Claude code, Copilot, or any other AI coding tool, you can drop the GitHub document into your project context and complete the entire integration with a single well-formed prompt.
This is the fastest path for most modern developers. The document contains everything the AI needs to generate correct request structures, callback handlers, and verification logic for your specific stack.
📄 Paymento GitHub Integration Docs →
Paymento has also published a video walkthrough showing exactly how to use this document with an AI coding assistant to integrate payments from scratch:
Path 2: Manual Integration (This Guide)
If you prefer to understand every layer before building or you’re integrating into a custom platform that needs specific handling, this guide walks through the full integration step by step with real API calls and code examples.
How the Paymento API Works: The Core Model
The integration flow has five steps:
1. Your server sends a payment request to Paymento API
2. Paymento returns a token
3. You redirect the customer to the Paymento payment gateway using the token
4. Customer completes payment and Paymento sends callback to your IPN URL
5. Your server calls the Verify API to confirm the payment, then fulfills the order
This is fundamentally different from card payment APIs. There’s no tokenization of sensitive card data, no PCI scope on your server, and no settlement window because Paymento is non-custodial, the funds land directly in the merchant’s configured wallet the moment the blockchain confirms the transaction.
Before You Start: What You Need
A Paymento merchant account, create one at app.paymento.io. No KYC required to get started.
Your API key, generated in the Paymento dashboard under API Key Generation. This goes in the Api-key header of every request.
Your secret key, also from the dashboard. Used for HMAC signature verification on callbacks. Keep this server-side only, never expose it in client code.
Your IPN URL configured, use the Set Payment Settings API to register your IPN (Instant Payment Notification) endpoint. This is where Paymento sends real-time payment status updates. Do not rely solely on the return URL redirect for order fulfillment.
An HTTPS endpoint for callbacks, Paymento sends POST requests to your IPN URL. It must be publicly accessible and HTTPS.
Step 1: Create a Payment Request
When a customer initiates checkout on your platform, your server sends a payment request to Paymento and receives a token in return.
Endpoint: POST https://api.paymento.io/v1/payment/request
Headers:
| Name | Value |
| Api-key | Your Merchant API Key |
| Content-Type | application/json |
| Accept | text/plain |
Request body parameters:
| Parameter | Type | Required | Description |
| fiatAmount | string | Optional | Amount in fiat currency (e.g. “29.99”) |
| fiatCurrency | string | Optional | Currency code (e.g. “USD” or “EUR”) |
| ReturnUrl | string | Optional | URL to redirect customer after payment completes or is cancelled |
| orderId | string | Optional | Your store’s internal order ID — returned in all callbacks |
| Speed | int | Required | 0 = High speed (accept on mempool, before block confirmation) / 1 = Low speed (wait for block confirmations) |
| cryptoAmount | JSON array | Optional | Specify exact crypto amounts if not using fiat conversion |
| additionalData | JSON array | Optional | Custom key-value pairs passed through to callbacks |
| EmailAddress | string | Optional | Payer email address — optional, not required |
Example request (cURL):
curl -X POST https://api.paymento.io/v1/payment/request \
  -H "Api-key: YOUR_API_KEY" \
  -H "Content-Type: application/json" \
  -H "Accept: text/plain" \
  -d '{
    "fiatAmount": "49.99",
    "fiatCurrency": "USD",
    "ReturnUrl": "https://yourstore.com/order/complete",
    "orderId": "ORDER-1042",
    "Speed": 1,
    "additionalData": [
      { "key": "invoice-number", "value": "INV-1042" }
    ]
  }'
Example request (JavaScript / Node.js):
const response = await fetch('https://api.paymento.io/v1/payment/request', {
  method: 'POST',
  headers: {
    'Api-key': process.env.PAYMENTO_API_KEY,
    'Content-Type': 'application/json',
    'Accept': 'text/plain'
  },

  body: JSON.stringify({
    fiatAmount: '49.99',
    fiatCurrency: 'USD',
    ReturnUrl: 'https://yourstore.com/order/complete',
    orderId: 'ORDER-1042',
    Speed: 1,
    additionalData: [
      { key: 'invoice-number', value: 'INV-1042' }
    ]
  })
});

const data = await response.json();
const token = data.body; // e.g. "3256e147c6fe4d36a9341a5112ed2214"
Example request (Python):
import requests
import os

response = requests.post('https://api.paymento.io/v1/payment/request',
    headers={
        'Api-key': os.environ['PAYMENTO_API_KEY'],
        'Content-Type': 'application/json',
        'Accept': 'text/plain'
    },

    json={
        'fiatAmount': '49.99',
        'fiatCurrency': 'USD',
        'ReturnUrl': 'https://yourstore.com/order/complete',
        'orderId': 'ORDER-1042',
        'Speed': 1,
        'additionalData': [
            {'key': 'invoice-number', 'value': 'INV-1042'}
        ]
    }
)

data = response.json()
token = data['body']  # e.g. "3256e147c6fe4d36a9341a5112ed2214"
Successful response (200):
{
  "success": true,
  "message": "",
  "body": "3256e147c6fe4d36a9341a5112ed2214"
}
The body field contains your payment token. Store this token, you’ll need it to redirect the customer, and again when verifying the payment.
Step 2: Redirect the Customer to the Payment Gateway
Once you have the token, redirect the customer to the Paymento hosted payment page:
https://app.paymento.io/gateway?token=TOKEN_HEREReplace TOKEN_HERE with the token from the previous step.
The Paymento payment page handles everything on the customer side: cryptocurrency selection, chain selection, QR code display, countdown timer, and payment monitoring. Your integration doesn’t need to build any of this, it’s handled by the hosted gateway.
In Node.js / Express:
res.redirect(`https://app.paymento.io/gateway?token=${token}`);In PHP:
header("Location: https://app.paymento.io/gateway?token=" . $token);Speed parameter: choosing between High and Low
The Speed parameter in your payment request determines when Paymento considers the payment complete:
- Speed: 0 (High) Paymento accepts the transaction as soon as it appears in the mempool (before block confirmation). Faster checkout experience for the customer, but carries a small risk of transaction being dropped before confirmation. Suitable for low-value transactions or merchants who prioritize UX over absolute security.
- Speed: 1 (Low) Paymento waits for block confirmations before marking the payment as complete. More secure, appropriate for higher-value transactions. The customer may wait a few extra minutes depending on the chain.
Step 3: Handle the Callback
After a customer completes (or cancels) a payment, Paymento does two things: redirects the customer to your ReturnUrl, and sends a POST request to your configured IPN URL with the payment status and details.
Critical note: Do not use the ReturnUrl redirect as the trigger for order fulfillment. The redirect is for the customer-facing experience. Your IPN URL receives the authoritative payment notification, always base fulfillment logic on the IPN callback, not the redirect.
Callback Payload
Paymento sends the following fields to both your Return URL and your IPN URL:
| Field | Description |
| Token | The payment token from your original request |
| PaymentId | Paymento’s internal payment ID (long integer) |
| OrderId | Your store’s order ID (the value you passed in the request) |
| OrderStatus | Numeric status code (see table below) |
| AdditionalData | The additional data array you passed in the original request |
Order Status Codes
| Status code | Name | Description |
| 0 | Initialize | Payment request accepted by the API |
| 1 | Pending | Customer has chosen a coin and chain |
| 2 | PartialPaid | Customer paid less than the required amount |
| 3 | WaitingToConfirm | Transaction received on the blockchain (mempool or block) |
| 4 | Timeout | Payment deadline expired without a transaction |
| 5 | UserCanceled | Customer clicked the cancel button at the gateway |
| 7 | Paid | Transaction confirmed on the blockchain ✅ |
| 8 | Approve | Payment verified by the store |
| 9 | Reject | Address no longer monitored, or payment not verified by the store |
The status you care about most is 7(Paid). This is the trigger to initiate your verification call. Do not fulfill orders on status 3 (WaitingToConfirm), the transaction is visible on-chain but not yet confirmed.
Example callback payload:
{
  "Token": "d1179e54e58d4e51a285a5c659a2b7ef",
  "PaymentId": 20016,
  "OrderId": "ORDER-1042",
  "OrderStatus": 7,
  "AdditionalData": []
}
Step 4: Verify the HMAC Signature
Before doing anything with a callback, verify that it actually came from Paymento. Every callback includes an X-HMAC-SHA256-SIGNATURE header. Validate it before processing.
Verification process:
- Take the raw body of the POST request (the entire JSON string, unparsed)
- Use your secret key from the Paymento dashboard
- Compute HMAC-SHA256 of the raw body using your secret key
- Convert the result to uppercase hexadecimal
- Compare with the value in the X-HMAC-SHA256-SIGNATURE header — they must match exactly
Node.js example:
const crypto = require('crypto');
function verifyPaymentoSignature(rawBody, receivedSignature, secretKey) {

  const calculated = crypto
    .createHmac('sha256', secretKey)
    .update(rawBody)
    .digest('hex')
    .toUpperCase();
  return calculated === receivedSignature;
}

// In your IPN handler:
app.post('/ipn', express.raw({ type: 'application/json' }), (req, res) => {

  const signature = req.headers['x-hmac-sha256-signature'];
  const isValid = verifyPaymentoSignature(req.body, signature, process.env.PAYMENTO_SECRET_KEY);

  if (!isValid) {
    return res.status(401).send('Invalid signature');
  }

  const payload = JSON.parse(req.body);
  // proceed to handle payment...
  res.sendStatus(200);

});
Python example:
import hmac
import hashlib

def verify_paymento_signature(raw_body: bytes, received_signature: str, secret_key: str) -> bool:
    calculated = hmac.new(
        secret_key.encode(),
        raw_body,
        hashlib.sha256
    ).hexdigest().upper()
    return calculated == received_signature

# In your Flask/FastAPI IPN handler:
@app.route('/ipn', methods=['POST'])

def ipn_handler():
    signature = request.headers.get('X-HMAC-SHA256-SIGNATURE')
    raw_body = request.get_data()

    if not verify_paymento_signature(raw_body, signature, os.environ['PAYMENTO_SECRET_KEY']):
        return 'Invalid signature', 401
    payload = request.get_json()

    # proceed to handle payment...
    return '', 200
Important: Parse the raw body after verification, not before. HMAC verification must use the raw bytes, parsing JSON first can alter whitespace and break the signature match.
Step 5: Verify the Payment
Once you’ve received a callback with OrderStatus: 7 (Paid) and validated the HMAC signature, make a verification API call to confirm the payment status with Paymento. This is the final check before fulfilling the order.
Endpoint: POST https://api.paymento.io/v1/payment/verify
Headers:
| Name | Value |
| Api-key | Your Merchant API Key |
| Content-Type | application/json |
| Accept | text/plain |
Request body:
| Parameter | Type | Required | Description |
| token | string | Required | The payment token from the original payment request |
Example (cURL):
curl -X POST https://api.paymento.io/v1/payment/verify \
  -H "Api-key: YOUR_API_KEY" \
  -H "Content-Type: application/json" \
  -H "Accept: text/plain" \
  -d '{ "token": "3256e147c6fe4d36a9341a5112ed2214" }'
Example (JavaScript):
async function verifyPayment(token) {
  const response = await fetch('https://api.paymento.io/v1/payment/verify', {
    method: 'POST',
    headers: {
      'Api-key': process.env.PAYMENTO_API_KEY,
      'Content-Type': 'application/json',
      'Accept': 'text/plain'
    },
    body: JSON.stringify({ token })
  });
  return response.json();
}
Successful response (200):
{
  "success": true,
  "message": "",
  "body": {
    "token": "3256e147c6fe4d36a9341a5112ed2214",
    "orderId": "ORDER-1042",
    "additionalData": [
      { "key": "invoice-number", "value": "INV-1042" }
    ]
  }
}
If success is true, fulfill the order. If success is false or you receive a 400 error, do not fulfill — log the response and investigate.
The Complete IPN Handler: Putting It All Together
Here’s a complete, production-ready IPN handler in Node.js that covers the full flow from callback receipt to order fulfillment:
const express = require('express');
const crypto = require('crypto');
const app = express();

// Use raw body parser for IPN endpoint — required for HMAC verification
app.post('/ipn', express.raw({ type: 'application/json' }), async (req, res) => {

  // Step 1: Verify HMAC signature
  const receivedSignature = req.headers['x-hmac-sha256-signature'];
  const calculatedSignature = crypto
    .createHmac('sha256', process.env.PAYMENTO_SECRET_KEY)
    .update(req.body)
    .digest('hex')
    .toUpperCase();

  if (calculatedSignature !== receivedSignature) {
    console.error('Invalid HMAC signature — possible spoofed callback');
    return res.status(401).send('Unauthorized');
  }

  // Step 2: Parse payload
  const payload = JSON.parse(req.body);
  const { Token, OrderId, OrderStatus, PaymentId } = payload;

  // Step 3: Only proceed on Paid status (7)
  if (OrderStatus !== 7) {
    // Log other statuses for your records, but don't fulfill
    console.log(`Order ${OrderId} status update: ${OrderStatus}`);
    return res.sendStatus(200); // Always return 200 to acknowledge receipt
  }
  // Step 4: Verify the payment with Paymento API
  try {
    const verifyResponse = await fetch('https://api.paymento.io/v1/payment/verify', {
      method: 'POST',
      headers: {
        'Api-key': process.env.PAYMENTO_API_KEY,
        'Content-Type': 'application/json',
        'Accept': 'text/plain'
      },
      body: JSON.stringify({ token: Token })
    });

    const verifyData = await verifyResponse.json();
    if (!verifyData.success) {
      console.error(`Payment verification failed for order ${OrderId}`, verifyData);
      return res.sendStatus(200); // Acknowledge receipt even on failure
    }

    // Step 5: Fulfill the order
    await fulfillOrder(OrderId); // your order fulfillment logic
    console.log(`Order ${OrderId} fulfilled successfully`);

  } catch (err) {
    console.error('Error during payment verification:', err);
  }
  // Always return 200 — if you return non-200, Paymento will retry the callback
  res.sendStatus(200);
});

async function fulfillOrder(orderId) {
  // Your order fulfillment logic here:
  // - Mark order as paid in your database
  // - Send download link / license key
  // - Trigger product delivery
  // - Send confirmation to customer

}
Handling Edge Cases
PartialPaid (status 2): The customer sent less than the required amount. Do not fulfill the order. Options: show the customer a “partial payment received” message with the shortfall amount, allow them to send the remainder to the same address, or issue a refund from your wallet to their address.
Timeout (status 4): The payment window expired before a transaction was detected. Mark the order as expired in your system. If the customer tries to pay after timeout, they’ll need to initiate a new payment request.
UserCanceled (status 5): The customer clicked cancel at the gateway. Return them to their cart or the product page. No action needed on your end beyond updating the order status.
Duplicate callbacks: Paymento may retry callback delivery if your IPN endpoint returns a non-200 response. Make your fulfillment logic idempotent, check whether the order has already been fulfilled before processing again.
Slow confirmations: Confirmation time varies by chain and current network activity. Don’t set short timeouts on your server-side verification logic. On Ethereum during high congestion, confirmation can take 20+ minutes.
Speed Setting: High vs Low, Which Should You Use?
| Speed 0 (High) | Speed 1 (Low) | |
| Triggers on | Mempool detection | Block confirmation |
| Customer wait time | Near-instant | Minutes (chain-dependent) |
| Risk level | Small (rare mempool drop) | Minimal |
| Best for | Digital goods under $50 | Any transaction, especially higher value |
For most digital goods and SaaS products, Speed: 0 provides a better customer experience. For high-value orders, use Speed: 1 and wait for confirmed status.
Go Live Checklist
Before switching to production traffic, run through this checklist:
- [ ] API key and secret key stored as environment variables – never hardcoded
- [ ] IPN URL registered via Set Payment Settings API in your Paymento dashboard
- [ ] HMAC signature verification implemented and tested
- [ ] IPN handler returns 200 on all paths (including errors) to prevent retries
- [ ] Fulfillment logic is idempotent — safe to run twice on the same order
- [ ] Order fulfillment only triggers on status 7 (Paid) after successful verify call
- [ ] PartialPaid (status 2) and Timeout (status 4) handled explicitly
- [ ] Test transaction completed on each chain you’re enabling
- [ ] Callback logs in place for debugging production issues
- [ ] Verify API call succeeds before any order fulfillment happens
Common Mistakes to Avoid
Fulfilling on WaitingToConfirm (status 3) instead of Paid (7). Status 3 means the transaction is visible in the mempool or a block, not yet confirmed. Always wait for status 7 before fulfilling, regardless of Speed setting.
Skipping the Verify API call. The callback tells you the payment happened. The Verify API confirms it with Paymento’s backend. Always make the verification call — don’t skip it because the callback looked correct.
Parsing the body before HMAC verification. JSON parsing can modify whitespace, breaking the signature comparison. Use raw body bytes for HMAC, then parse after validation passes.
Returning non-200 from your IPN endpoint. Paymento interprets any non-200 response as a failed delivery and will retry. If your handler encounters an error, log it and still return 200 — retry logic should be on your side, not triggered by Paymento retries.
Relying on the ReturnUrl redirect for order fulfillment. The return URL redirect is for the customer experience and it can be blocked by browser redirects, network issues, or the customer closing the tab. Your IPN URL is the authoritative payment notification channel.
Hardcoding API keys in source code. Always use environment variables. Never commit API keys to version control.
Full API Reference Links
- API Overview
- Payment Request
- Payment Callback
- Payment Verify
- Additional APIs
- Swagger / OpenAPI Spec
- GitHub Integration Document
Frequently Asked Questions
Do I need to run a blockchain node? No. Paymento handles all blockchain monitoring. Your integration only communicates with the Paymento API – no direct blockchain interaction required.
How do I test without spending real crypto? Paymento has a testing and simulation environment. Check the Testing and Simulation documentation for how to create test transactions without real funds.
Can I use the same API key for multiple stores? Each merchant account has its own API key. If you’re running multiple stores, each should have its own Paymento merchant account and API key for clean separation of orders and callbacks.
How do I handle refunds via API? Refunds in crypto payments are outgoing transactions from your wallet to the customer’s wallet address. Paymento’s non-custodial architecture means your funds are already in your wallet; refunds are sent directly from there, not through a gateway refund API. The customer’s wallet address is available from the payment details.
Is there a rate limit on the API? Check the Additional APIs documentation for current rate limit details, or contact Paymento support for enterprise-level rate limit requirements.
What’s the difference between the Return URL and the IPN URL? The Return URL is where the customer’s browser is redirected after they complete or cancel a payment; it’s a user-facing redirect. The IPN URL is a server-to-server POST from Paymento to your backend with payment status data. Fulfillment logic should always be based on the IPN callback, not the Return URL redirect.
The Bottom Line for Developers
The Paymento API is a clean, well-structured integration with a small surface area: one endpoint to create a payment, one to verify it, and a callback handler for the events in between. The full integration including request, redirect, callback, HMAC verification, verify, and fulfillment can be built in an afternoon.
If you’re using an AI coding assistant, drop the [GitHub integration document →] into your project context and you can generate a working integration in a single prompt. The Swagger spec covers every field and response structure your AI needs to produce correct code.
Get your API key and start building →
Questions about your integration? Contact us or explore the full documentation.