How to Add Crypto Payments to Your WooCommerce Store: Complete Setup Guide (2026)
WooCommerce powers over 30% of all online stores globally. Most of them accept credit cards, PayPal, maybe Stripe. A growing number are adding crypto, not because it’s trendy, but because it solves real business problems: international customers who can’t use cards easily, chargeback risk on digital goods, payment processors that hold your revenue for days before releasing it.
The Paymento WooCommerce plugin adds non-custodial crypto payments to any WooCommerce store meaning every payment lands directly in your wallet the moment it confirms on-chain. No intermediary holding your funds. No settlement window. No withdrawal fees.
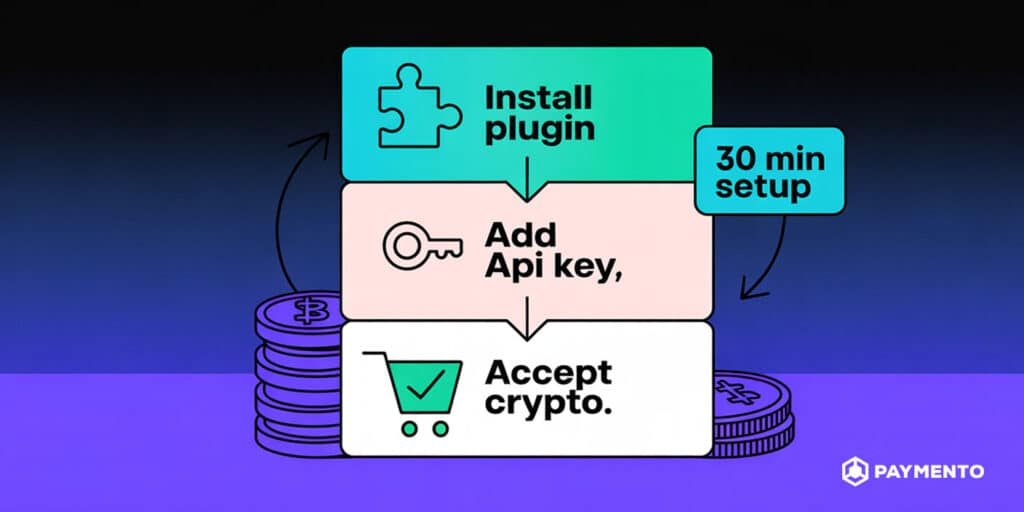
This guide covers the complete setup from plugin installation to your first live transaction. If you follow each step, you’ll be accepting Bitcoin, USDT, Ethereum, and other cryptocurrencies at checkout in under 30 minutes.
Why WooCommerce Crypto Payment?
Before getting into setup, it’s worth understanding why this is worth doing for your specific business.
No chargebacks. Crypto transactions are irreversible by design. Once confirmed on the blockchain, a payment cannot be reversed by the customer, their bank, or their card network. For merchants selling digital goods, software, courses, templates, memberships; this eliminates the chargeback fraud that costs the industry billions annually.
International customers without friction. A customer in Southeast Asia, Eastern Europe, or Latin America with USDT in their wallet can pay you instantly, at near-zero cost, with no currency conversion, no card declined, and no cross-border payment failure. This is a real revenue channel for stores that currently lose international sales to payment infrastructure problems.
Direct wallet settlement. With Paymento’s non-custodial architecture, payment arrives in your configured wallet the moment the blockchain confirms the transaction. No payment processor holds your money overnight. No withdrawal request needed. Your revenue is yours immediately.
Lower fees. Paymento charges 0.5% per transaction. Stripe charges 2.9% + $0.30. On a $100 order, that’s $0.50 vs $3.20. a meaningful difference at any volume. New merchants also receive $100 in free credit, which covers your first transactions at no cost.
Crypto alongside your existing payment methods. Paymento adds crypto as an additional checkout option, it doesn’t replace Stripe, PayPal, or any other gateway you’re already using. Customers who prefer to pay with cards still can. You’re opening a new payment channel, not closing existing ones.
What You Need Before Installing
Make sure your store meets these requirements before starting:
| Requirement | Minimum version |
| WordPress | 6.0 or higher |
| WooCommerce | 8.0 or higher |
| PHP | 8.0 or higher |
You’ll also need:
- A Paymento merchant account — free to create at app.paymento.io
- Your API key and Secret key — generated in the Paymento dashboard after account creation
- Your crypto wallet addresses — for account-based chains (Bitcoin, Litecoin, Ethereum, Tron, Solana), you’ll need your wallet address per chain. For Bitcoin (UTXO chain), you’ll need your XPUB. If you’re not sure what this means, the XPUB and wallet setup guide explains it in full.
To check your current WordPress, WooCommerce, and PHP versions: go to WooCommerce → Status in your WordPress admin. The System Status page shows all version information.
Step 1: Install the Paymento Plugin
You have two installation methods, both work identically once the plugin is active.
Method A: Install from the WordPress Plugin Directory (Easiest)
- Log into your WordPress admin panel
- Go to Plugins → Add New Plugin
- In the search box, type “Paymento crypto gateway”
- Find “Paymento – Non-Custodial Crypto Payment Gateway for WooCommerce” in the results
- Click Install Now
- After installation completes, click Activate Plugin
Method B: Manual Upload
- Go to the plugin page on WordPress.org and click Download
- In your WordPress admin, go to Plugins → Add New Plugin → Upload Plugin
- Click Choose File, select the downloaded .zip file
- Click Install Now
- After installation, click Activate Plugin
Once activated, you’ll see “Paymento” appear in your WooCommerce payment methods list. It won’t be active at checkout yet — you need to configure it first.
Step 2: Get Your API Key and Secret Key from Paymento
Before touching the plugin settings, get your credentials from the Paymento dashboard.
- Log into app.paymento.io
- Create Store and click on API Key button
- Generate your API key if you haven’t already
- Copy both your API Key and your Secret Key
Important: Keep these two keys separate and treat them differently.
Your API Key identifies your merchant account on every request, it’s used in API call headers and can be considered semi-public in the sense that it goes into your plugin configuration.
Your Secret Key is used to verify that callbacks (payment notifications) actually came from Paymento and not from a spoofed request. The plugin uses it server-side for HMAC signature verification. Never expose it in client-side code, never commit it to a public repository, and don’t share it with anyone.
The Paymento plugin handles the security implementation automatically — you just need to enter the key in the right field.
Step 3: Configure the Plugin in WooCommerce
With your credentials ready, go to the plugin settings:
- In your WordPress admin, go to WooCommerce → Settings → Payments
- Find Paymento in the payment methods list
- Click Manage (or the toggle to enable it first, then Manage)
You’ll see the following fields:
Enable/Disable — Check this box to make Paymento appear as a payment option at checkout. Leave unchecked while you’re still configuring.
Title — The payment method name your customers see at checkout. Something like “Pay with Crypto” or “Cryptocurrency Payment” works well. Keep it short and clear.
Description — A brief explanation shown to customers below the title at checkout. This is a good place to mention which coins you accept: “Pay with Bitcoin, USDT, Ethereum, and more. Payments processed by Paymento.”
API Key — Paste your Paymento API key here. When you click Save, the plugin will automatically ping the Paymento API to verify the key is valid and retrieve your merchant name. If you see your merchant name appear after saving, the connection is working.
Secret Key — Paste your Paymento secret key here. This is used for webhook signature verification, the plugin won’t process payment callbacks without a valid secret key configured.
Debug Log — Leave this off in production. Enable it temporarily if you’re troubleshooting — it writes detailed API communication logs to WooCommerce → Status → Logs.
Once you’ve filled in all fields, click Save Changes before moving to the next step.
Step 4: Choose Your Confirmation Type
This setting determines the customer experience after they submit a payment. It’s one of the most important configuration decisions and the right choice depends on your business type.
Option 1: Redirect Immediately and Hold Invoice (Recommended for Most Stores)
The customer is redirected back to your WooCommerce store as soon as they submit payment before blockchain confirmation. The order is created in WooCommerce with a “pending” or “on-hold” status, and the status updates automatically once Paymento confirms the on-chain transaction.
Best for:
- Digital goods (courses, downloads, software licenses)
- Physical goods where fulfillment takes time anyway
- Any store where the customer experience matters more than instant certainty
- Lower-value transactions
Why it works well: Customers aren’t left staring at a payment page waiting for blockchain confirmations, which can take minutes depending on the chain and network conditions. They get back to your store, see their order confirmation, and the status updates in the background.
Option 2: Wait for Payment Confirmation
The customer stays on the Paymento payment page until their transaction is confirmed on the blockchain. Only then are they redirected to your store and the order is created.
Best for:
- High-value transactions where you want certainty before creating an order record
- Merchants who prefer explicit confirmation before any fulfillment triggers
- B2B payments where both parties want clear confirmation
Why to use it selectively: On Ethereum during periods of network congestion, confirmation can take 20 minutes or more. This means the customer is watching a waiting screen for a significant time. On Tron or Solana, it’s 1–3 minutes — more acceptable.
For most WooCommerce stores selling digital goods at typical price points, Option 1 with automatic status updates gives the best customer experience.
Step 5: Configure Your Wallet in the Paymento Dashboard
The plugin handles the WooCommerce side — but you also need to configure which wallet addresses you’re receiving payments to in your Paymento merchant dashboard.
For account-based chains (Ethereum, Tron, BNB Chain, Solana):
- In your Paymento dashboard, go to payment settings
- Enter your wallet address for each chain you want to accept
- Connect your wallet using MetaMask (for EVM chains like Ethereum and BNB), TronLink (for Tron), or WalletConnect (for mobile wallets)
- Complete the wallet signing step — this links your address to your merchant account for payment matching
For Bitcoin (UTXO chain):
- Export your XPUB from your hardware wallet (Ledger or Trezor)
- Enter the XPUB in your Paymento dashboard for Bitcoin
- Paymento will derive a unique Bitcoin address for each transaction, all going directly into your wallet
If you use Ledger and see an XPUB mismatch warning, check the Ledger XPUB Mismatch help guide — this is a common issue related to account types (Legacy vs SegWit) that has a straightforward fix.
IPN URL configuration: The plugin sets your IPN (Instant Payment Notification) URL automatically the first time it successfully connects to the Paymento API using your API key. You should see it populated in your Paymento dashboard under payment settings after your first save. If callbacks aren’t arriving, verify the IPN URL is set correctly — it should point to your WooCommerce store’s webhook endpoint.
Step 6: Test Before Going Live
Never skip testing. A 10-minute test saves you from discovering a configuration problem when a real customer is waiting.
What to test:
- Checkout flow — Place a test order on your store, select Paymento as the payment method, and confirm you’re redirected to the Paymento payment gateway. The gateway should display available cryptocurrencies and chains.
- Test transaction — Use Paymento’s testing and simulation environment (docs.paymento.io/accept-crypto-payments/testing-and-simulation) to simulate a completed payment without spending real crypto. Confirm the WooCommerce order status updates correctly after the simulated payment.
- Order status — Check that your WooCommerce order moves from “Pending Payment” to the correct status (typically “Processing” or “On Hold” depending on your confirmation type setting) after a test payment.
- Debug log check — Enable debug log temporarily (WooCommerce → Settings → Payments → Paymento → Manage → Debug Log), run a test transaction, then check WooCommerce → Status → Logs to confirm the API communication is clean with no errors.
- Multiple chains — If you’re accepting USDT on both TRC-20 and ERC-20, test at least one transaction per chain to confirm each is configured and receiving correctly.
Once all tests pass, go back to the plugin settings, ensure Enable/Disable is checked, and you’re live.
What the Customer Experience Looks Like
From your customer’s perspective, the crypto checkout flow works like this:
- Customer adds items to cart and proceeds to checkout
- They see “Pay with Crypto” (or whatever title you set) as a payment option alongside your other methods
- They select it and click Place Order
- They’re redirected to the Paymento payment gateway — a hosted page that shows available cryptocurrencies and chains
- Customer selects their preferred coin and chain (e.g. USDT on TRC-20)
- A payment address and QR code appear with a countdown timer
- Customer sends payment from their wallet or exchange withdrawal
- After payment (immediately with Option 1, or after confirmation with Option 2), they’re redirected back to your WooCommerce Order Received page
- They see their order confirmation — same as any other WooCommerce payment method
The crypto complexity is entirely contained within the Paymento payment page. Your store’s checkout, order confirmation, and email notifications all work exactly as they do for card payments.
Classic Checkout vs WooCommerce Blocks: Does It Matter?
WooCommerce has two checkout interfaces — the classic PHP template checkout and the newer block-based checkout built with Gutenberg. Many stores are migrating to blocks.
The Paymento plugin supports both out of the box. You don’t need to configure anything differently depending on which checkout type your theme uses. Whether your checkout page uses the classic [woocommerce_checkout] shortcode or the modern WooCommerce Checkout block, the Paymento payment option will appear and function correctly.
HPOS Compatibility
High-Performance Order Storage (HPOS) is WooCommerce’s modern order management system, available since WooCommerce 8.2. It stores orders in dedicated database tables rather than WordPress post tables, which significantly improves performance for high-volume stores.
Paymento’s plugin is fully HPOS-compatible. If you’ve enabled HPOS in your WooCommerce settings (which is recommended for stores on WooCommerce 8.2+), the plugin will work without any conflicts or workarounds.
Pricing: What Does the Paymento Plugin Actually Cost?
Plugin installation: Free. No purchase required, no license key.
Transaction fee: 0.5% per payment processed.
Free credit: Every new Paymento account includes $100 in free credit. This covers your first transactions at no cost — effectively free to start and validate that crypto payments work for your customer base before you’re paying anything.
To put the fee in context:
| Payment method | Fee on $100 order |
| Stripe | $3.20 (2.9% + $0.30) |
| PayPal | $3.49 (3.49%) |
| Paymento | $0.50 (0.5%) |
At $10,000/month in crypto payment volume, the fee difference between Stripe and Paymento is $240/month — roughly $2,880/year. The fee savings alone justify adding the payment method for any store with meaningful volume.
There are no monthly fees, no setup fees, and no withdrawal fees (non-custodial architecture means funds go directly to your wallet — there’s no withdrawal transaction to charge for).
Troubleshooting Common Issues
Paymento not appearing at checkout Check your WordPress version (6.0+ required), WooCommerce version (8.0+ required), and PHP version (8.0+ required) in WooCommerce → Status. Also verify the Enable/Disable checkbox is checked in the plugin settings.
API key error on saving settings Verify the key was copied correctly from your Paymento dashboard — no leading or trailing spaces. The plugin pings https://api.paymento.io/v1/ping/merchant/ on save to verify the key. If your server has outbound request restrictions, ensure it can reach api.paymento.io.
Order status not updating after payment This is almost always a webhook/IPN issue. Check that your IPN URL is correctly set in your Paymento dashboard. Enable Debug Log and look at WooCommerce → Status → Logs for the Paymento log — it will show whether callbacks are arriving and whether they’re being processed. Also verify your server’s firewall isn’t blocking incoming POST requests from Paymento’s servers.
LiteSpeed server — callbacks not received LiteSpeed web server has specific handling for POST requests that can interfere with Paymento callbacks. There’s a dedicated fix documented at docs.paymento.io/callback-issues-with-litespeed.
Infinite loading on checkout This was a known bug fixed in version 1.2.0. If you’re on an older version of the plugin, update to 1.2.1 via Plugins → Installed Plugins → Check for updates.
XPUB mismatch warning This is a Ledger-specific issue related to account type mismatch between what Ledger exports and what Paymento expects. Full resolution steps at docs.paymento.io/help-and-troubleshooting/ledger-live-xpub-mismatch.
A Note on WordPress Version Compatibility
The current plugin version (1.2.1) was tested up to WordPress 6.4.7. WordPress is currently at version 6.7+, which means there’s a gap in official compatibility testing.
In practice, the plugin functions correctly on current WordPress versions, the core functionality (WooCommerce payment gateway integration, API communication, webhook handling) doesn’t depend on WordPress internals that have changed significantly between 6.4 and 6.7. However, if you’re running a high-volume production store, the safest approach is to test on a staging environment first before activating on production.
A plugin update with expanded compatibility testing is on the roadmap. In the meantime, the debug log is your best tool for catching any unexpected behavior; enable it during initial testing and review the logs after your first few transactions.
Frequently Asked Questions
Is the Paymento WooCommerce plugin free? Yes, free to install and free to use until you exceed your $100 credit. After that, a 0.5% transaction fee applies per payment. No monthly fees, no setup costs.
Which cryptocurrencies can I accept on WooCommerce with Paymento? Bitcoin, Ethereum, USDT (ERC-20 and TRC-20), BNB, Solana, and many others. The full list of supported coins and chains is available in your Paymento dashboard. You configure which ones you accept customers see only the options you’ve enabled.
Does it work with WooCommerce Blocks (Gutenberg checkout)? Yes, fully compatible with both classic WooCommerce checkout and the modern block-based checkout. No additional configuration needed.
Do my customers need a crypto wallet to pay? Yes, for payments from a personal wallet. Customers can also pay directly from a centralized exchange withdrawal (Binance, Coinbase, etc.) they withdraw to the payment address shown at checkout. No wallet app required for that flow.
How do I get paid — when does money arrive in my wallet? For account-based chains, funds arrive in your configured wallet address as soon as the blockchain confirms the transaction, typically within minutes depending on the chain. For Bitcoin via XPUB, the payment goes directly to a derived address in your wallet. There’s no settlement window, no withdrawal request, and no transfer from Paymento, the funds are in your wallet from the moment of on-chain confirmation.
Can I use Paymento alongside Stripe and PayPal? Yes. WooCommerce supports multiple simultaneous payment methods. Paymento appears as an additional option at checkout, customers choose which method they want to use. Enabling Paymento doesn’t affect your existing payment gateways.
What happens if a customer overpays or underpays? Paymento detects both cases. Underpayments are flagged with a PartialPaid status, the order is placed on hold pending the shortfall. Overpayments are recorded in your dashboard. Refund handling for crypto payments is done by sending from your wallet to the customer’s address, you initiate this manually from your wallet as needed.
What if a customer pays after the payment timer expires? The payment link expires and the order is marked as timed out. The customer would need to start a new checkout. If funds arrive after expiry (which can happen if the customer was slow), Paymento will record it, contact support for resolution in these edge cases.
You’re Ready to Accept Crypto at WooCommerce Checkout
Adding crypto payments to WooCommerce with Paymento takes under 30 minutes, costs nothing to start, and opens your store to a global customer base that pays in crypto by preference or by necessity.
The 0.5% fee, direct wallet settlement, zero chargebacks, and WooCommerce Blocks + HPOS compatibility make it one of the most straightforward additions you can make to your store’s payment options.